Push data from Leadfwd to your existing apps using our no-code connector framework.
Leadfwd leverages JSON powered webhooks to deliver and sync data with over 5,000 apps within the Zapier ecosystem. No coding is required to leverage Leadfwd <> Zapier and the integrations can be setup seamlessly through your browser, just point and click.
Inbound and Outbound Integrations
Our Zapier Connectors can be configured to send data to third-party apps via Zapier (outbound) or they can be configured to receive data from third-party apps via Zapier (inbound). This article is going to specifically focus on outbound connectors, which push data via Zapier to third-party apps of your choosing.
Prerequisites:
- Leadfwd Admin Access to manage Integrations and Connectors
- Integrations / Zapier / Outbound Connectors
- Generate your Authorization Key + Secret
- Zapier Account and Plan (Starter or higher)
- Third-party app credentials (in our example we are connecting Slack to Leadfwd)
- Most Zapier apps use the Oauth token framework that requires a login to connect your app, like Slack, to Zapier. Other apps may require API keys or tokens. Consult the Zapier app guide to figure out which you will need. Expect to need credentials as an Admin or Owner from your third-party app to successfully connect to Zapier.
Leadfwd connects to Zapier using our API v2 webhook functions. Zapier plans include access to their webhook event (learn more here), which can be used to enable Leadfwd to receive data from your apps and to enable Leadfwd to push data to your apps, all using Zapier.
Step 1. To begin, click on + Create Zap from Home

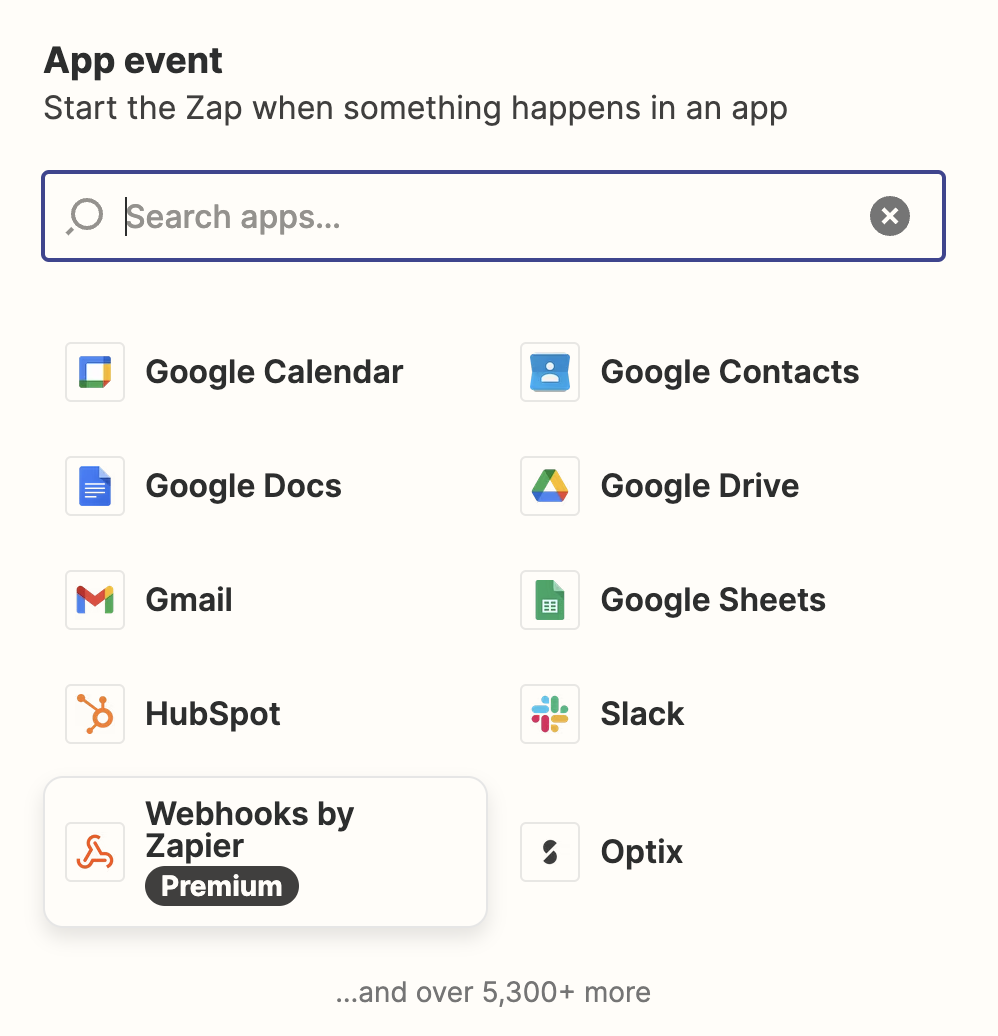
Step 2. To push data from Leadfwd to a 3rd party app in Zapier's app collection, you'll begin by selecting Webhooks by Zapier as the initial App event.
Step 3. Select Catch Hook as the Event type and click Continue.
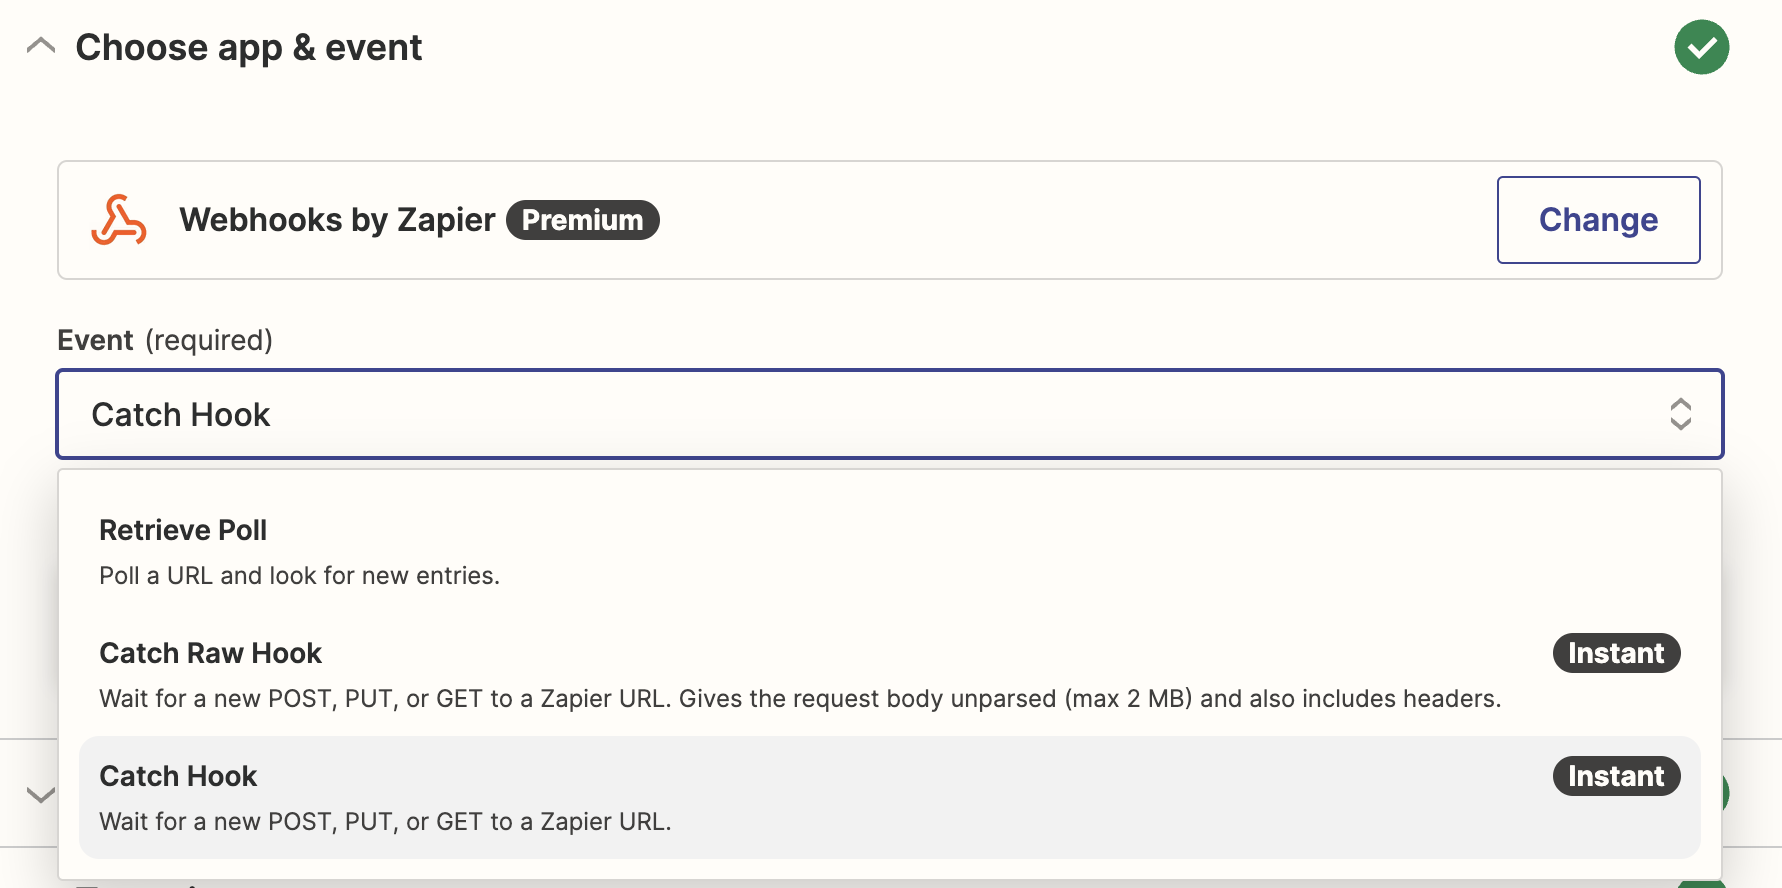
Note: Do NOT select Catch Raw Hook
Step 4. Unless you want to specify only a specific child data field, simply click Continue.
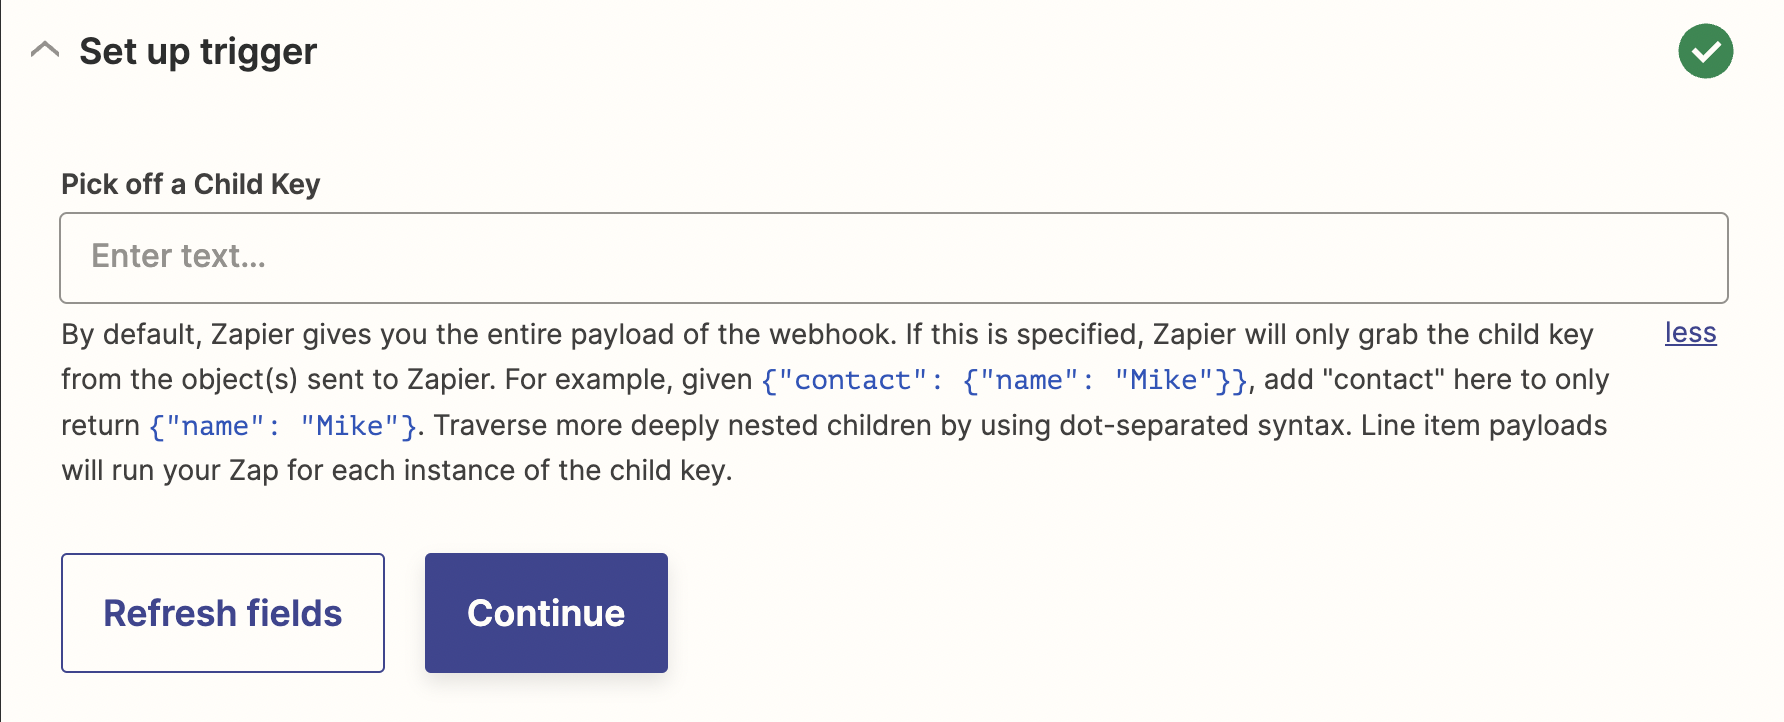
Step 5. Copy the webhook URL provided by Zapier and open a new browser tab to login to Leadfwd.
Important: Each Zap will have a unique webhook URL and they cannot be used for any other purpose, other than the rules being created in this specific Zap.

Step 5. Add the Zapier webhook URL to a Leadfwd Outbound Connector
With the Zapier webhook URL copied, now we'll proceed to our Leadfwd account to add/paste the URL into a new Outbound Connector.
Our Zapier Connector supports multiple purpose-based Inbound and Outbound Connector. Each with a specific configuration and role/purpose. For example, we're creating an Outbound Connector that will have a role of sending relevant data to Zapier, which will then be pushed to a Slack notification.
At the conclusion of this article, we will pivot and create an Automation rule that will govern when data is pushed to Zapier via this Outbound Connector and then from Zapier to our Slack notification.
To access your Zapier Connector in Leadfwd:
- Navigate to Settings
- Scroll down the Settings view and expand the Integrations menu
- Click on Zapier or Available apps (then select Zapier from the Integration Collection)
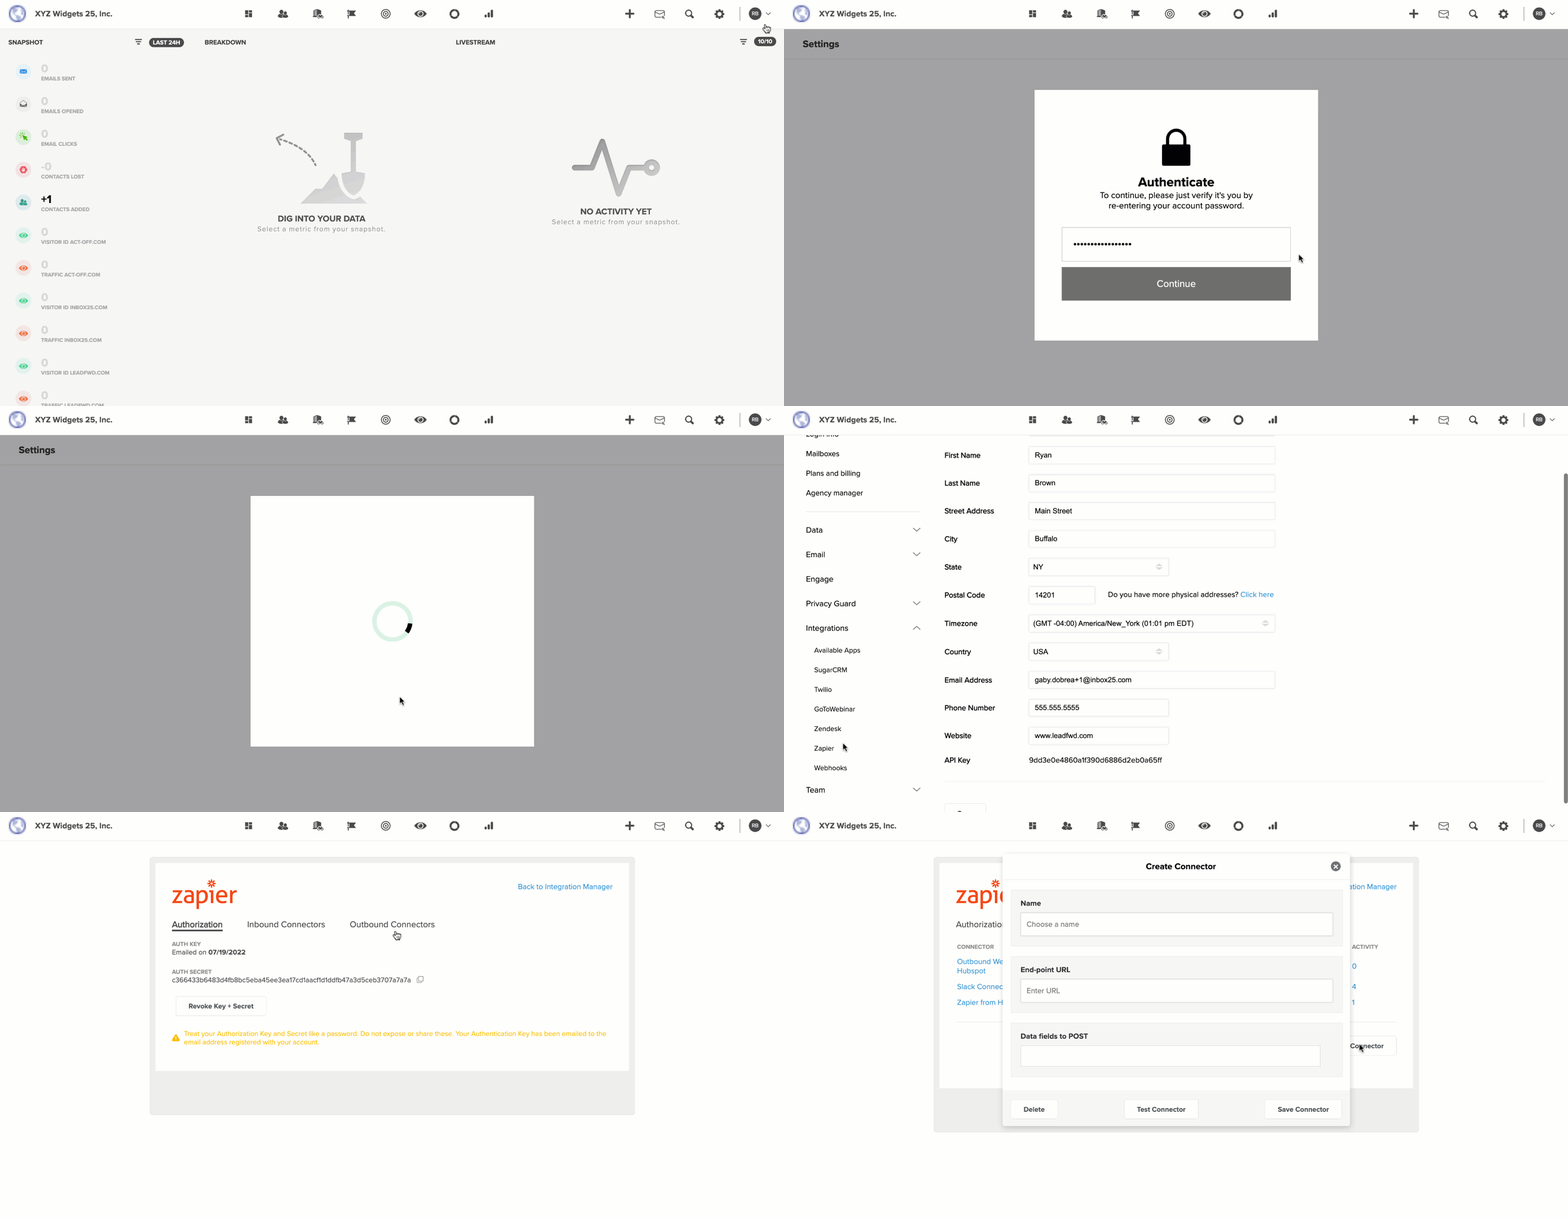
Create the Outbound Connector and Add the Zapier webhook URL
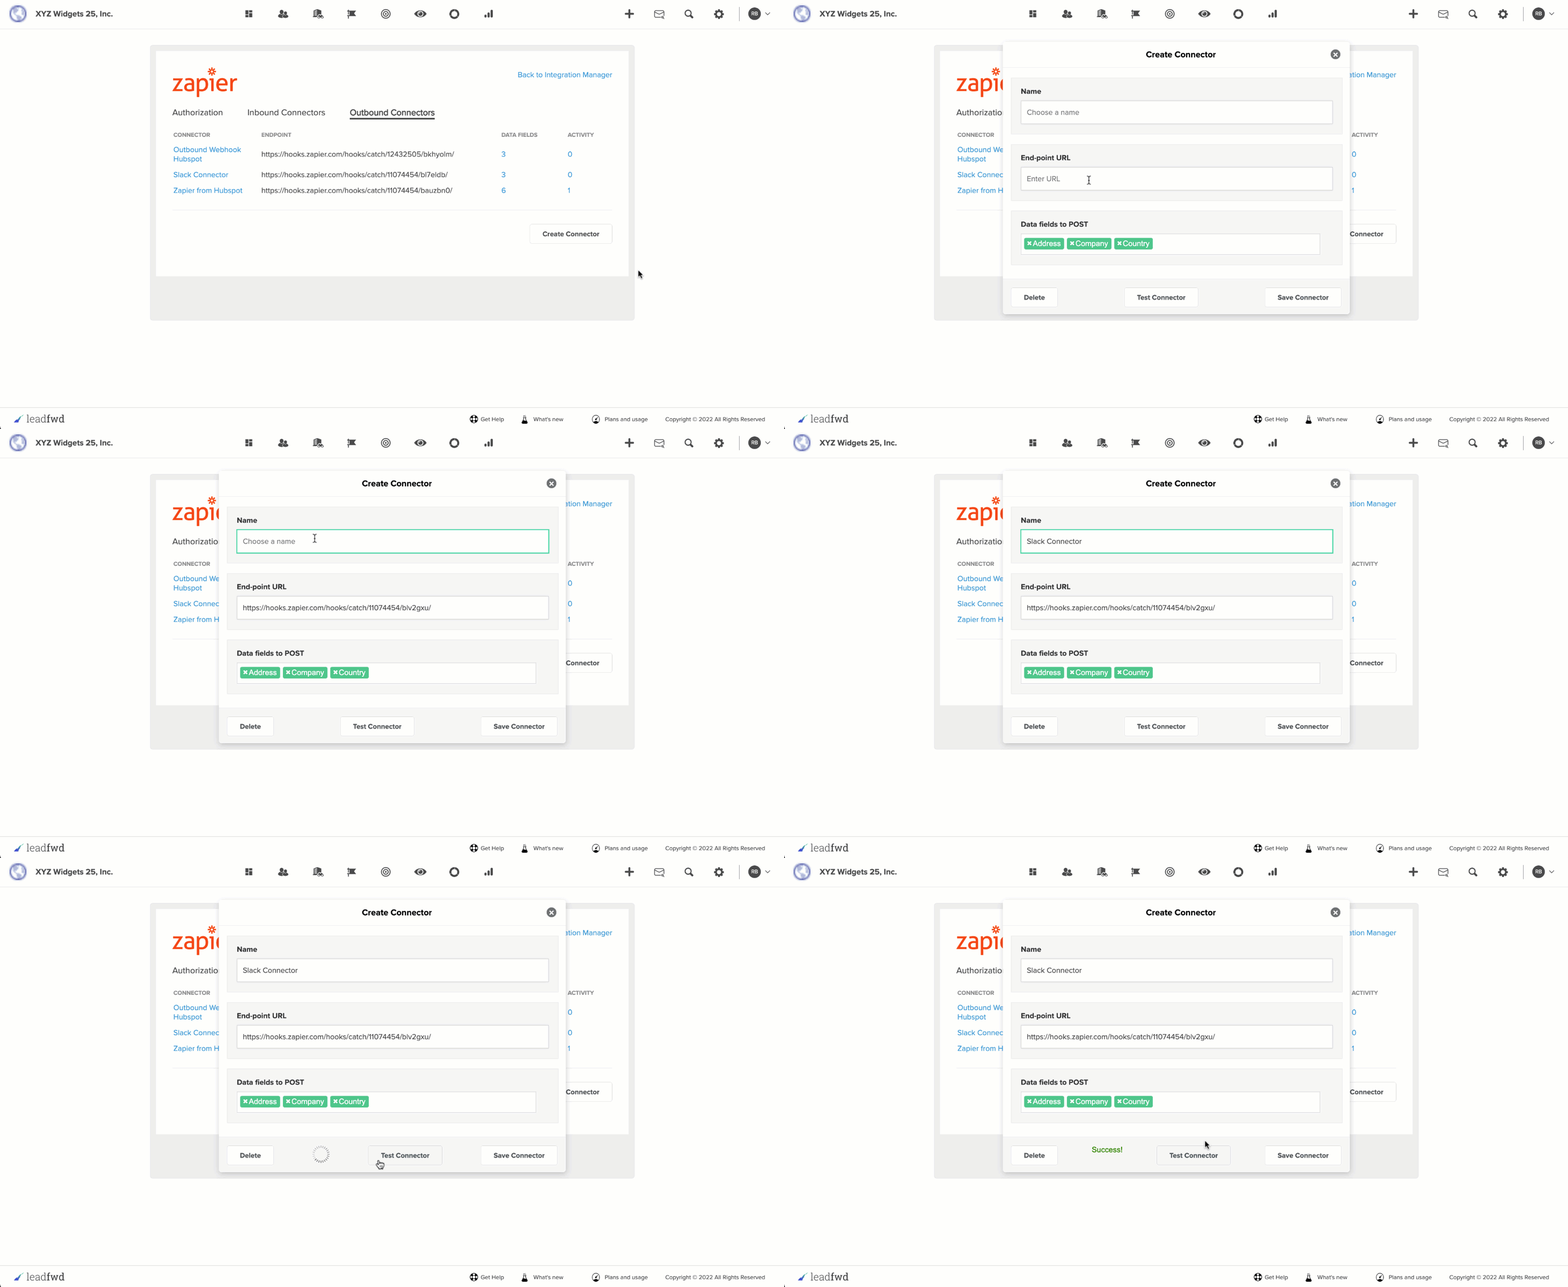
Name your Connector
A simple and easily identifiable name that you and your team can recognize. Consider a naming convention to organize multiple connectors. The connector name will also appear with the webhook post and can be useful for identifying the underlying purpose. So, for example, if you're creating an event that sends a Slack alert when an existing lead returns to your website, then naming the connector for that purpose is a good idea. Slack Integration | Returning Site Visitor | Alerts | $user
End-point URL
This is the URL that we received from Zapier in our previous view within their application, that was copied to your clipboard.
Data fields to POST
Leadfwd allows you to customize the specific data and custom fields that are pushed to the Zapier Connector. This data will be made available to the third-party app(s) that you're connecting to via Zapier. The data fields will be automatically filled with your contact(s) field values each time the webhook event is triggered.
Simply select the menu field below 'Data fields to POST' and select one or multiple different fields available. The available fields in the menu span all available Contact and CRM lists within your Leadfwd account, so in the event of multiple lists it's important to understand that not every contact will have every field or a value in the field. It can and will likely vary from contact to contact.
Some fields are not available for selection and will send by default in addition to the data fields you've selected, including Name, Email address, Date Created, List Source, Status, etc.
Test Connector
Once you've selected your data fields you can now send the test post to Zapier by clicking Test Connector. During this process we will send a full sample webhook event post to Zapier to process. We will randomly select a contact record from your Leadfwd account to auto-fill the data fields as well.
This test will provide Zapier with the data format and structure, which you can then use to customize how each datapoint will be transferred to the third-party app that you're integrating with via Zapier.
Example of webhook payload:
email austin@*****.com
Step 7. Select an app to work with in Zapier
Now that the Leadfwd Connector is integrated with Zapier, it's time to configure the third-party app that you're transmitted the data to via Zapier. Tab back over to the Zap Builder in your browser and select the app you want to push data to.
In our example we'll be selecting Slack.
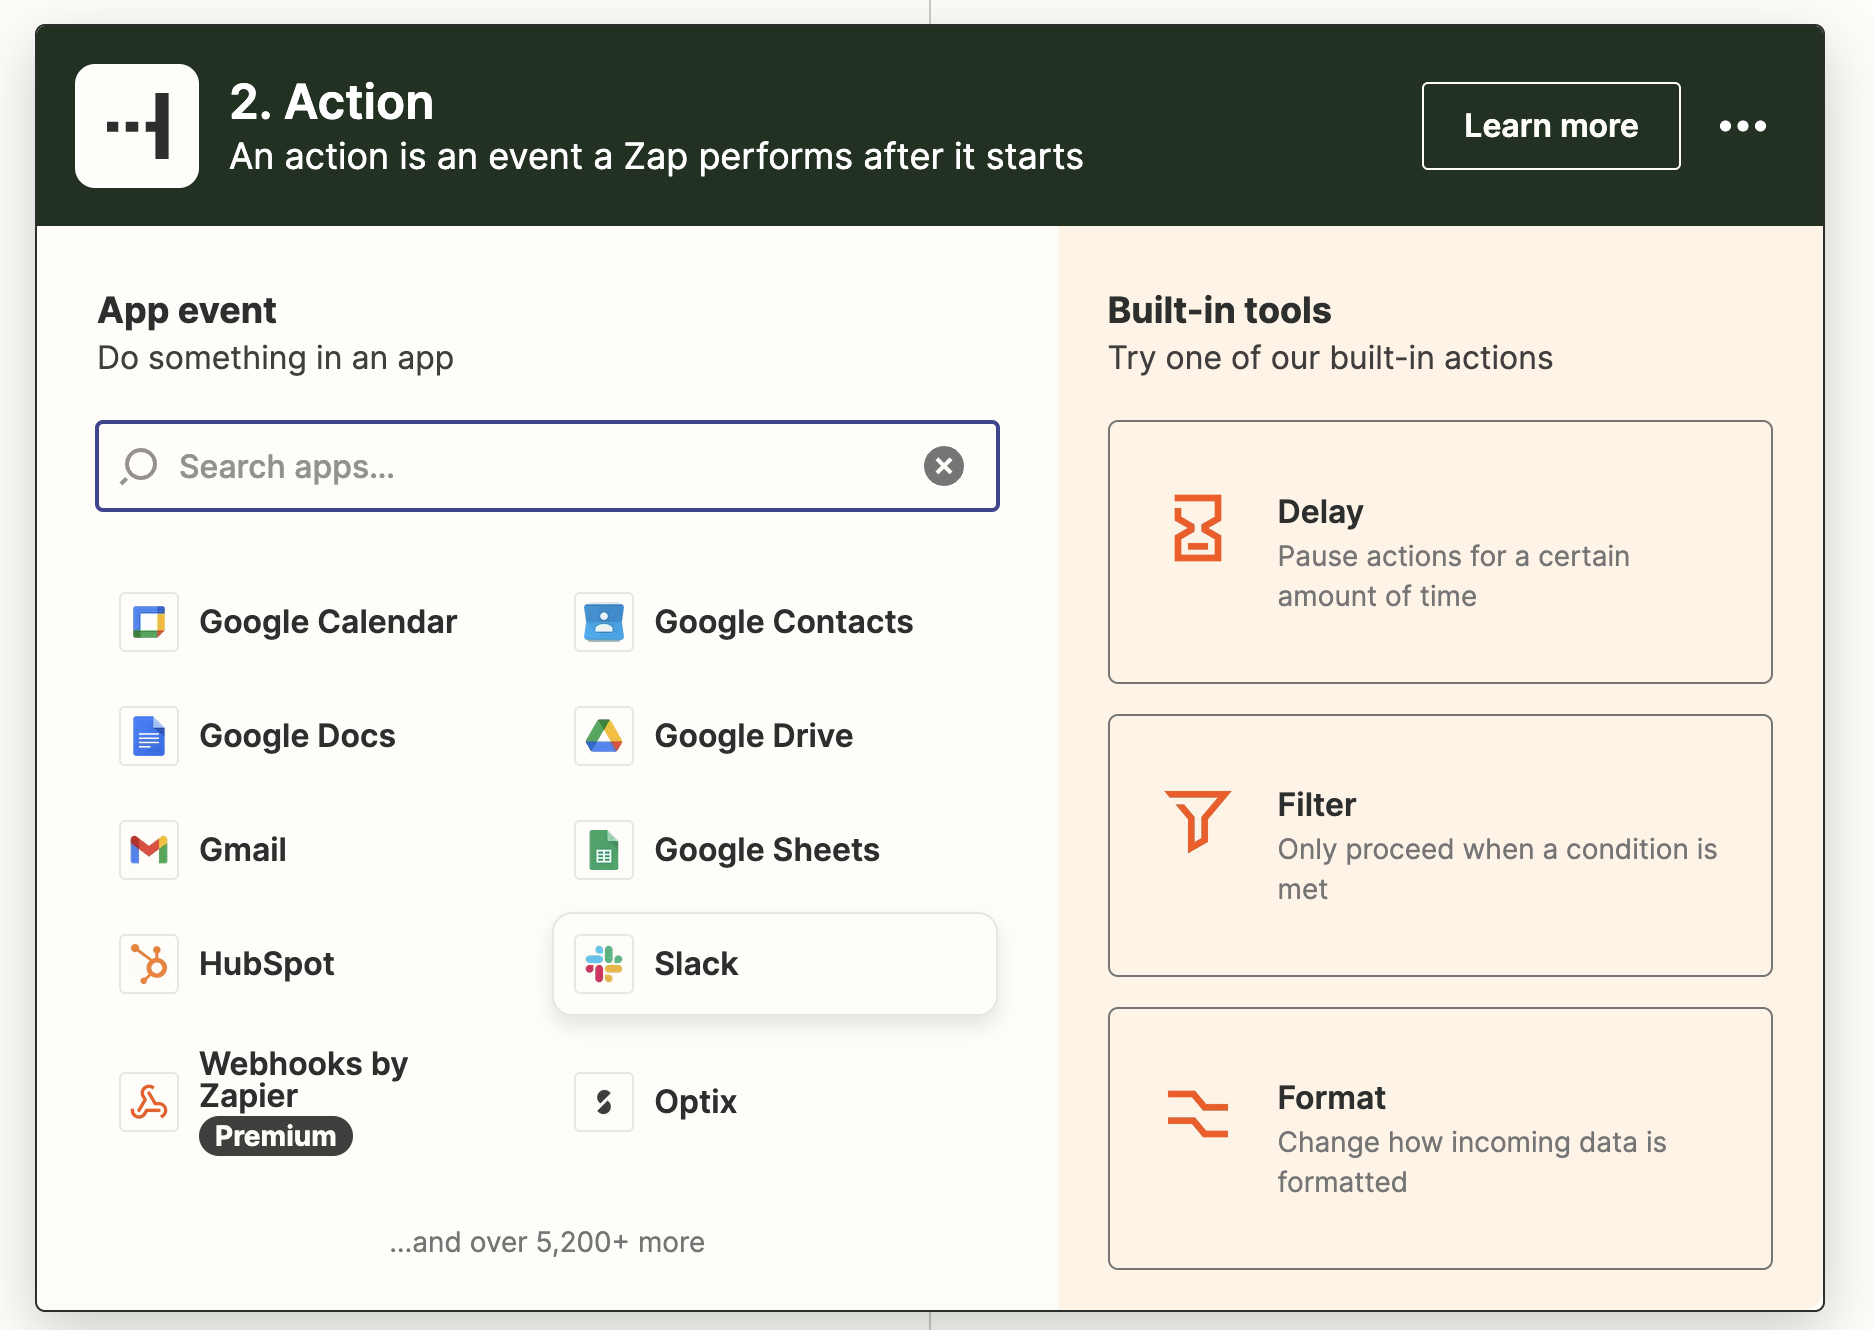
Step 8. Build the event action in Zapier
Our goal with this example is to build a Slack alert that will notify our team when a positive reply is received to any outbound Sequence that we are deploying.
The first step in that process after we select Slack as our action/app, is to then define the Event type. Events will be unique for every app in the Zapier ecosystem and as you can see below, Slack's are customized around, well, Slack.
To accomplish our goals, we are selecting Send Channel Message.
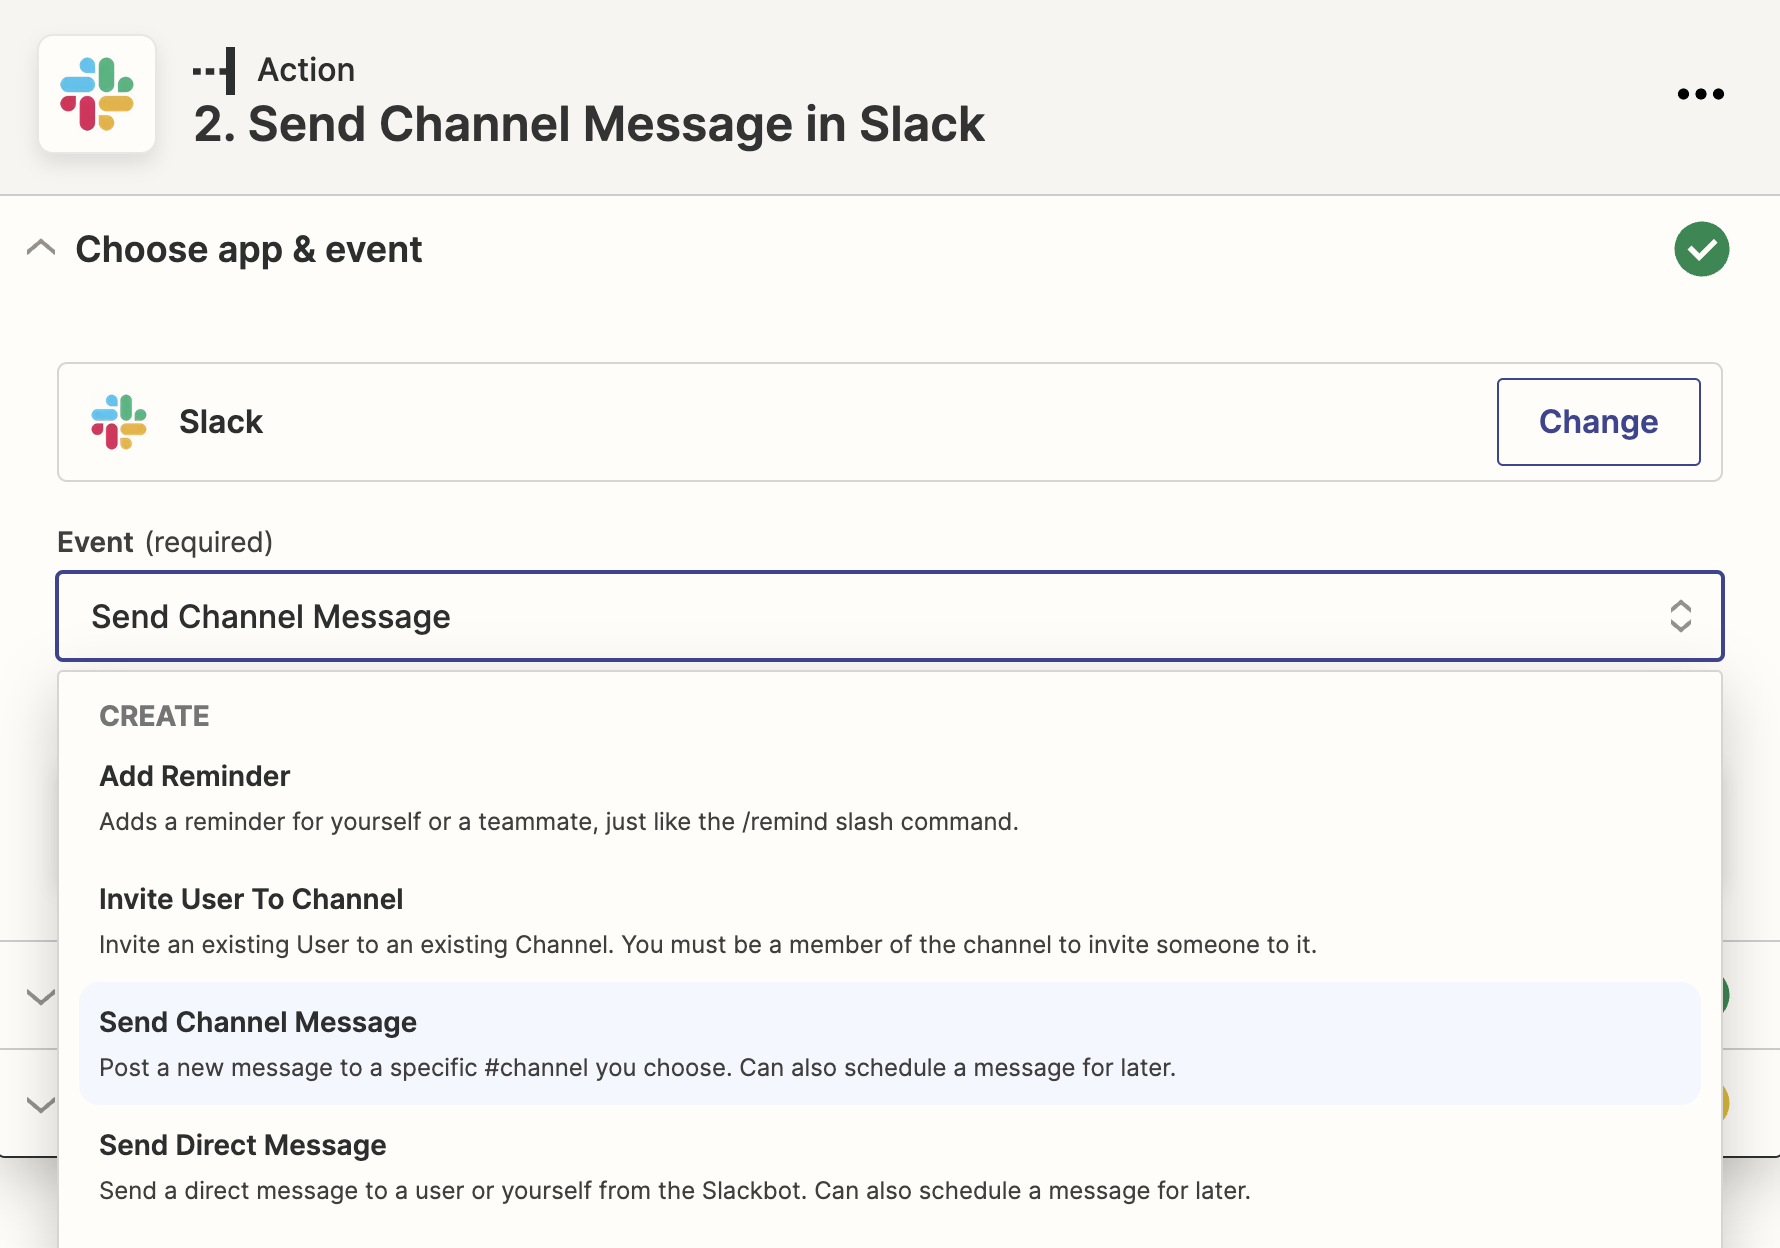
Step 9. Authorize your app and connect to Zapier
Zapier maintains direct partnerships and API connections to thousands of applications. In order to push data to your third-party app, you'll need to connect the app to Zapier. Like everything else, this process is designed by Zapier to be extremely simple. In most cases you'll only need a username and password to login to the app of your choosing or an API key in other cases.
From the Choose account menu, you can select an existing connection that you have established for a previous Zap or click on + Connect a new account -- then follow the step by step instructions.
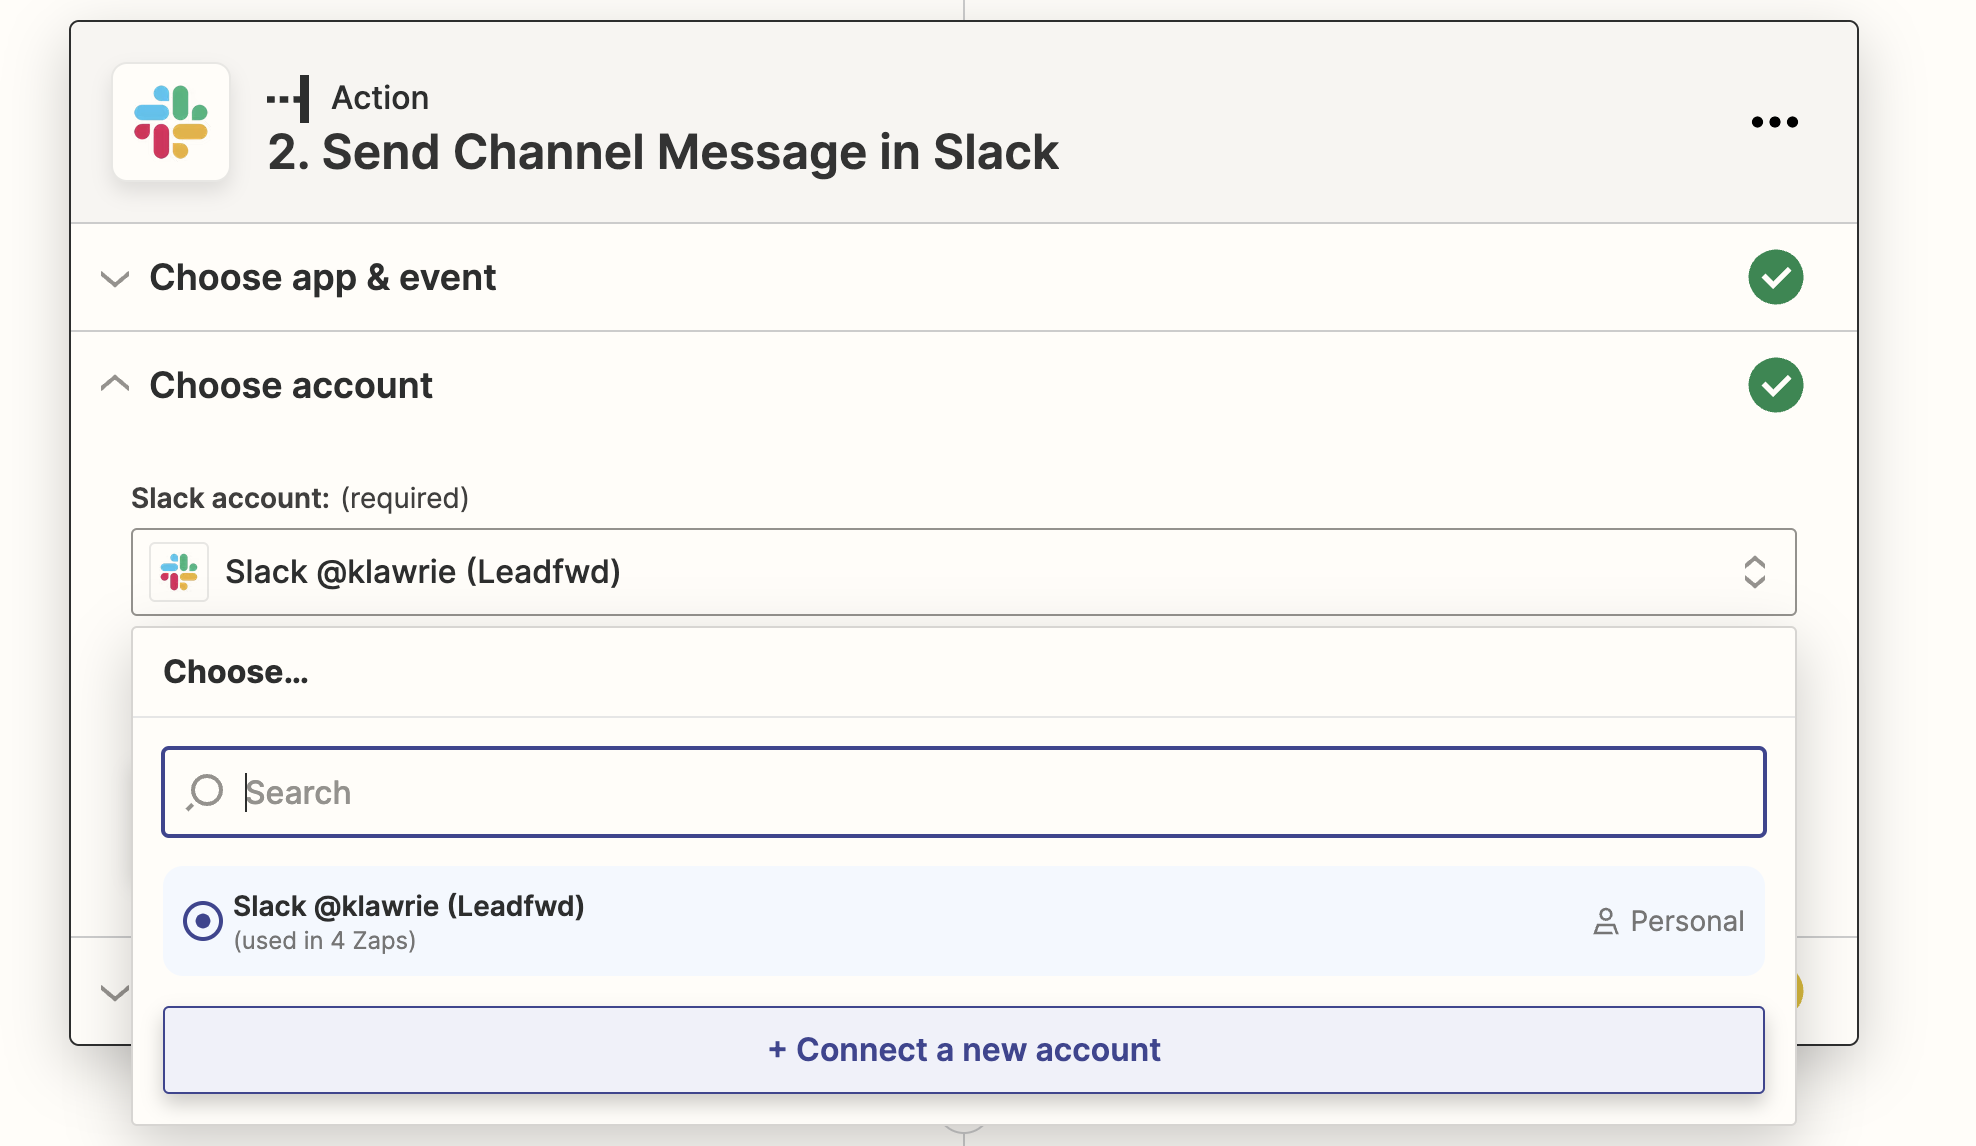
Step 10. Set up the action and customize the data sent to your app
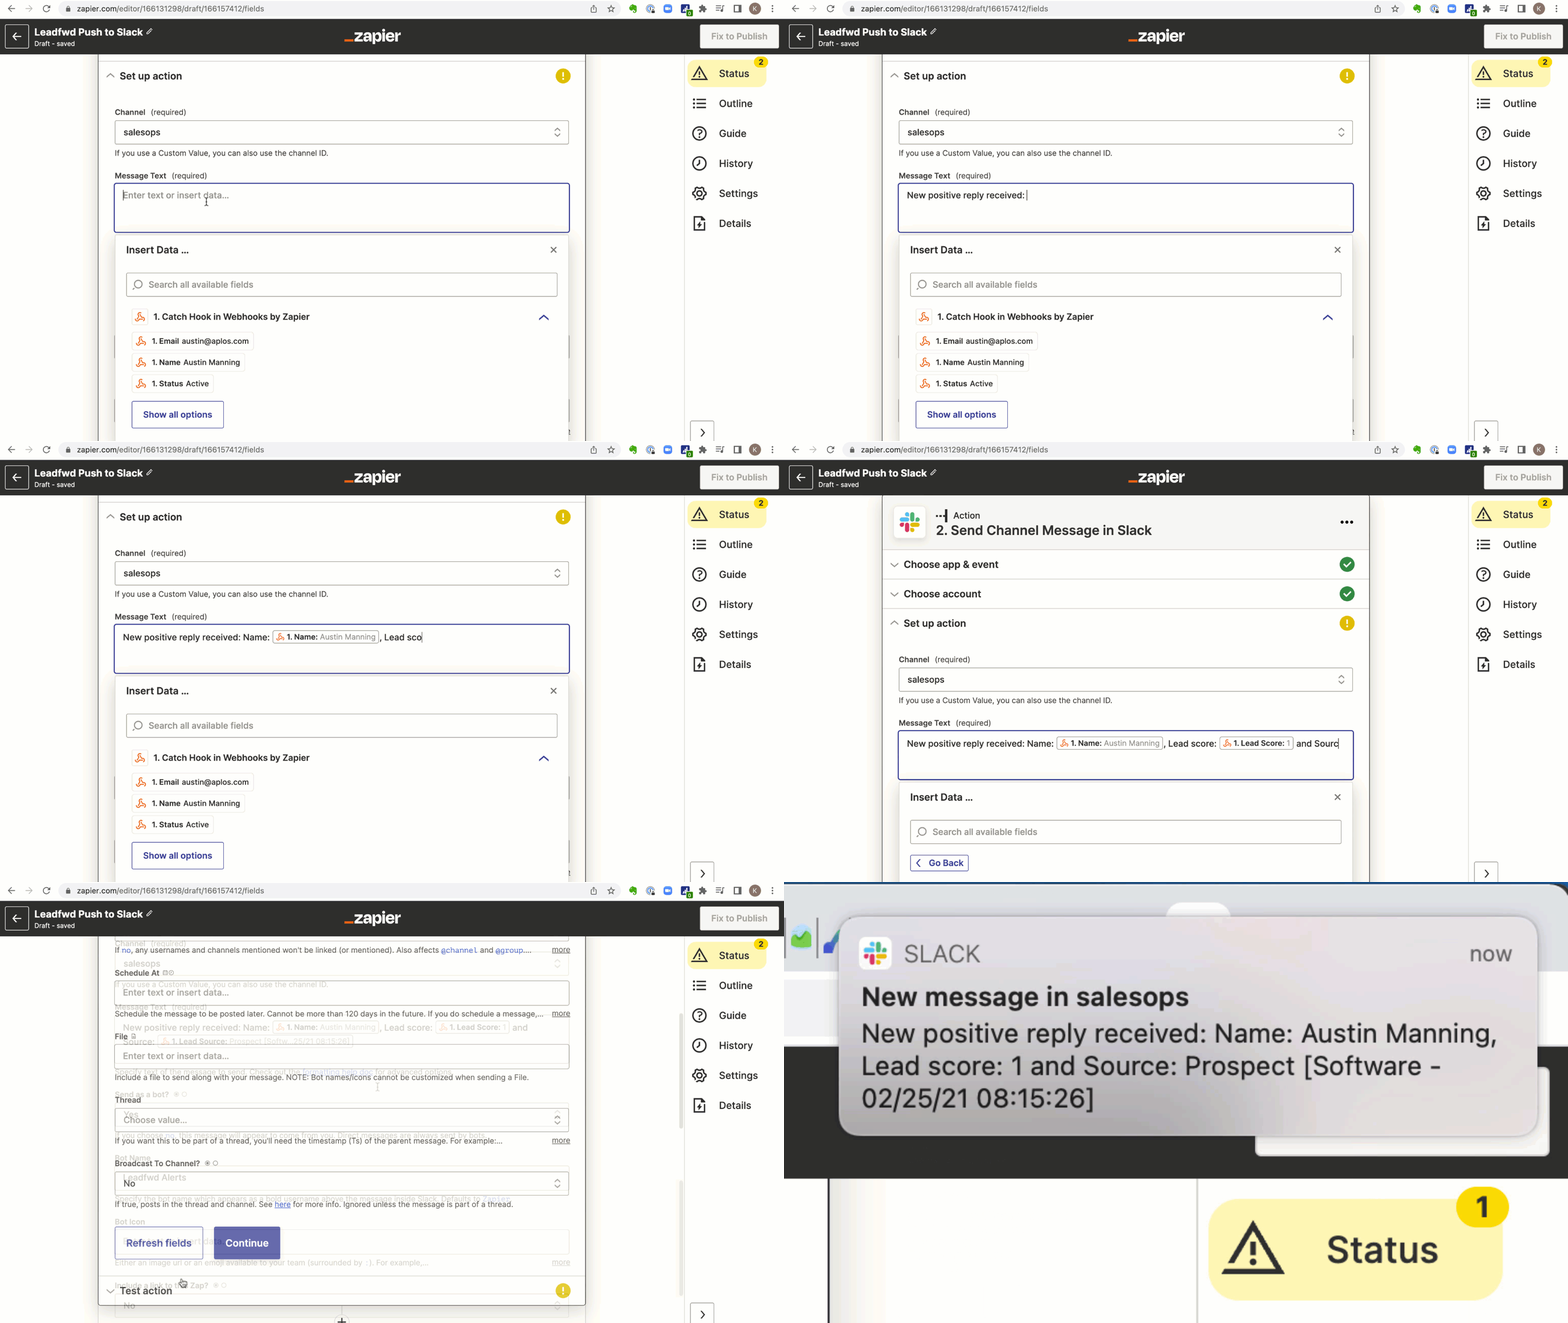
In our example we are personalizing the message format that's posted to Slack and selecting which channel it posts in. As mentioned, every app integration with Zapier will have its own customization available. But as you can see there is a great deal of flexibility in terms of how the data is captured and rendered for your app(s).
Within the Insert Data ... menu you will be given access to the individual data fields that Leadfwd is providing to Zapier (as configured in your Outbound Connector settings).
In our example we are adding a static message that will appear in Slack: New positive reply received:
Then, following that static message we are including some select data fields that will POST to Zapier from Leadfwd and then to Slack. In the example below we are adding static labels for Name, Lead score and Source. After each label we are selecting the corresponding data field from the Insert Data ... menu.
Once you complete your action configuration, proceed to the end of the dialog and perform a quick test to validate the set up. In our case we received a sample Slack notification to our channel using the format we specified.
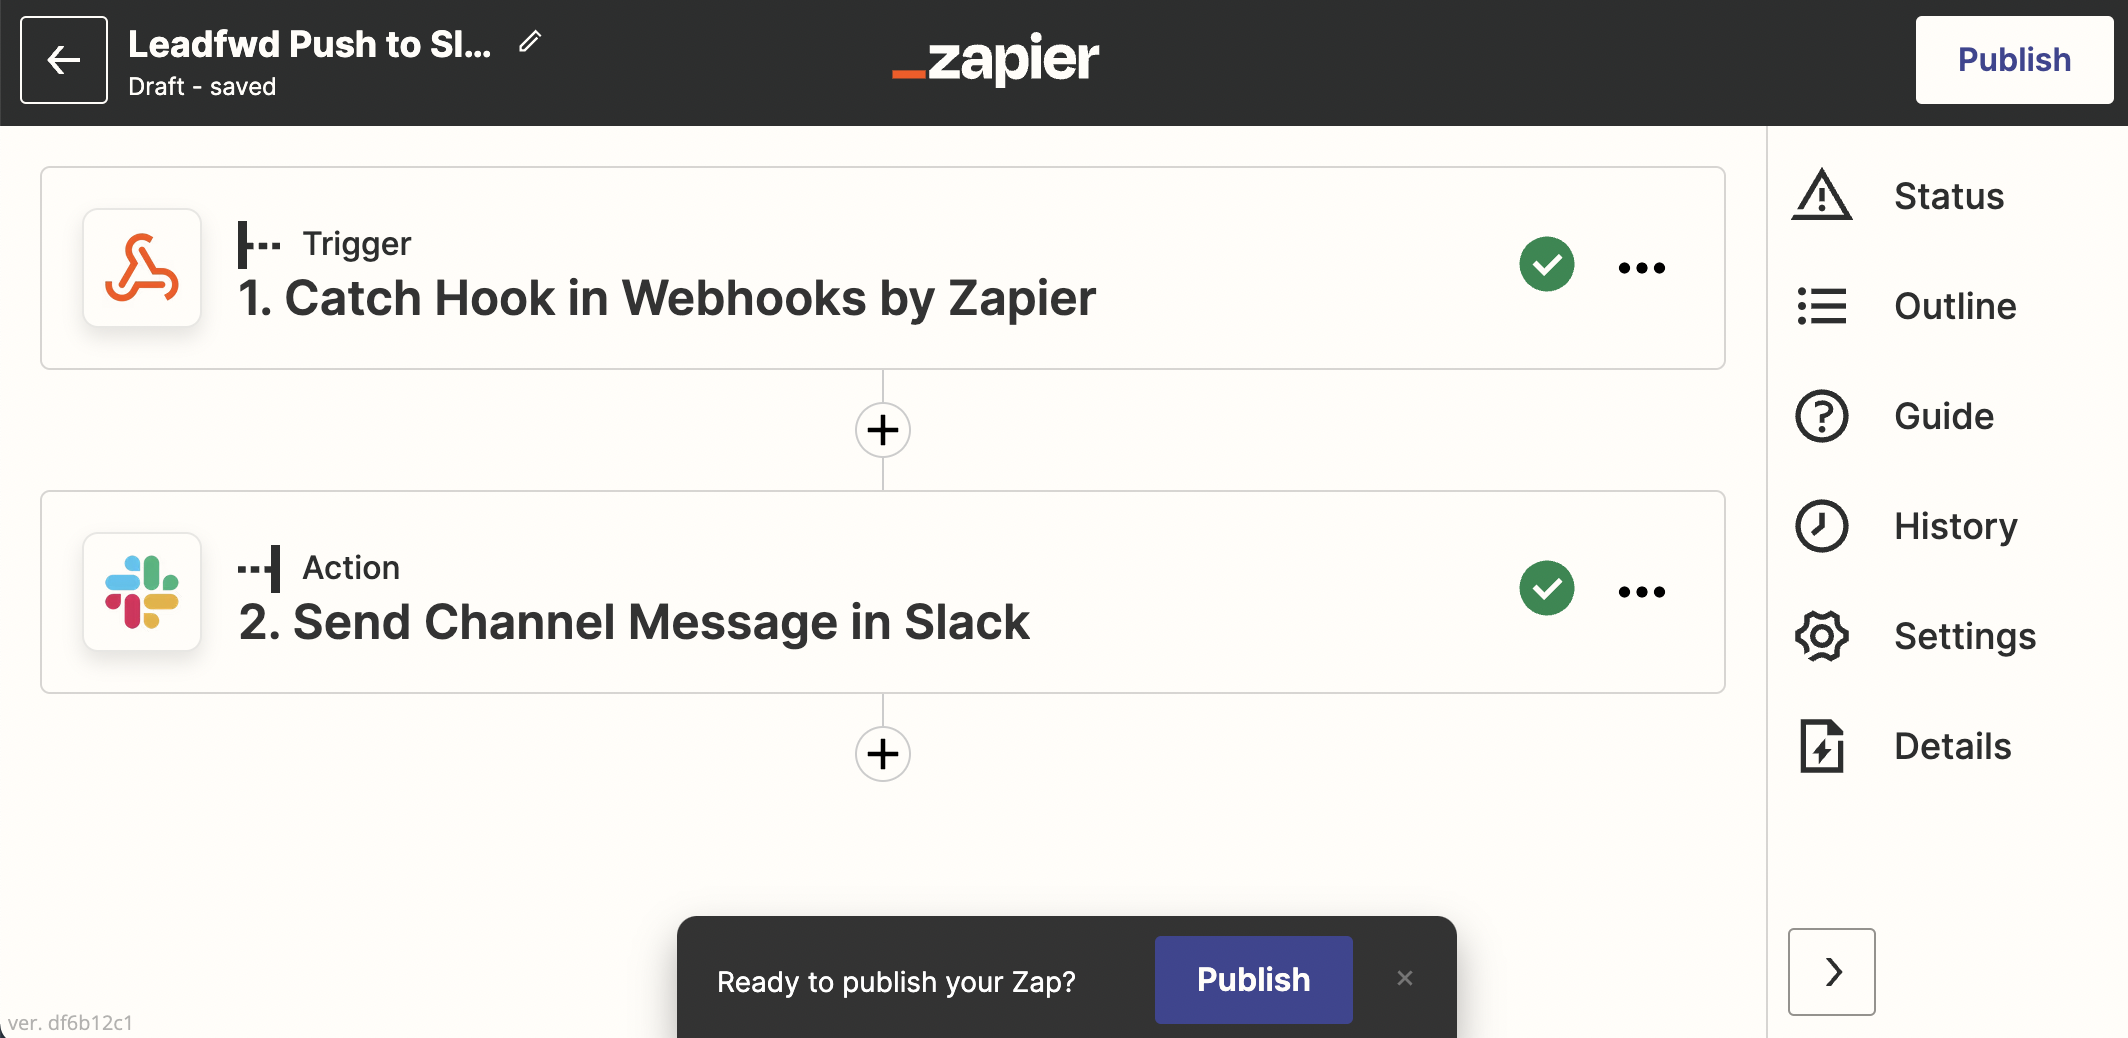
Step 11. Publish your Zap
Comments
0 comments
Please sign in to leave a comment.