
Getting Started
Enable API Access with a Google Project
To enable API access with Gmail you need to create a Google Project for your organization in Google Workspace.
Step-by-step process (3-5 minutes to complete):
4. Configure Oauth Consent Screen, Set Permissions (Scopes) and Domain Paths.
5. Copy your Client ID and Secret.
Business Accounts (Workspace) only: Our Google Workspace (Gmail) connector only works with business accounts. It doesn't not work with free personal Gmail accounts.
Registering a Google Platform Web Application (it's free!)
Registering a Google Web Application takes less than 5 minutes and is completely free. Why does Leadfwd require this? Two reasons:
-
To grant our customers complete control over the data integration between Google Workspace (Gmail) and Leadfwd.
-
By controlling your own connector web application, your organization will not be at risk of sending violations from any other organizations using Leadfwd, as each organization has their own unique Application ID with Google.
Register a Google Project
To get started, click here (https://console.cloud.google.com/projectcreate) to start the registration process.
You'll be required to login as an Administrator of your Gmail (Google Workspace) organization.
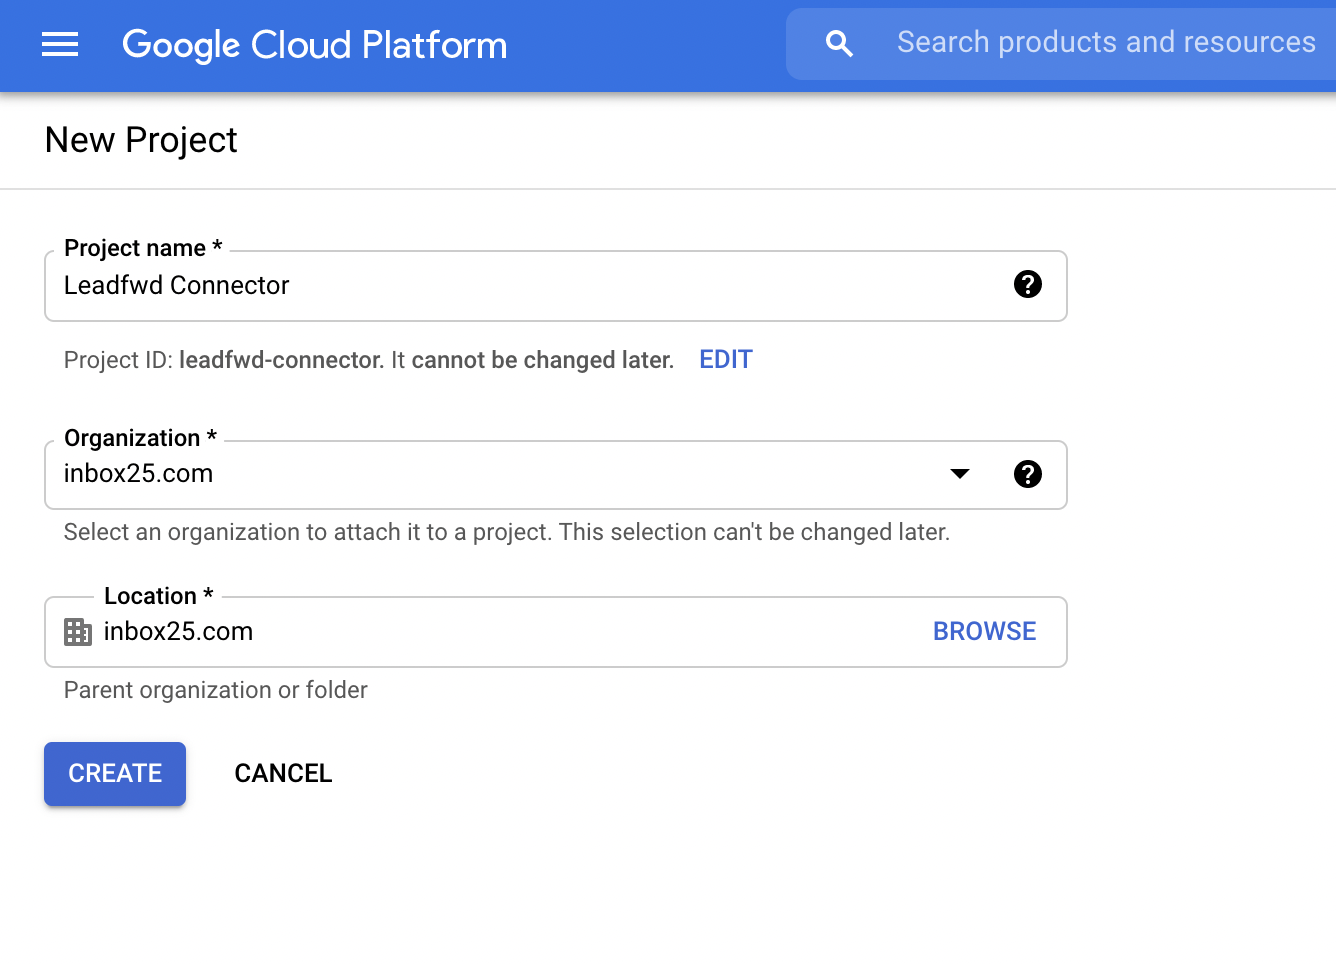
Name your Project accordingly with a label that you will recognize as being purposed for Leadfwd (i.e. Leadfwd Connector), then click Create.
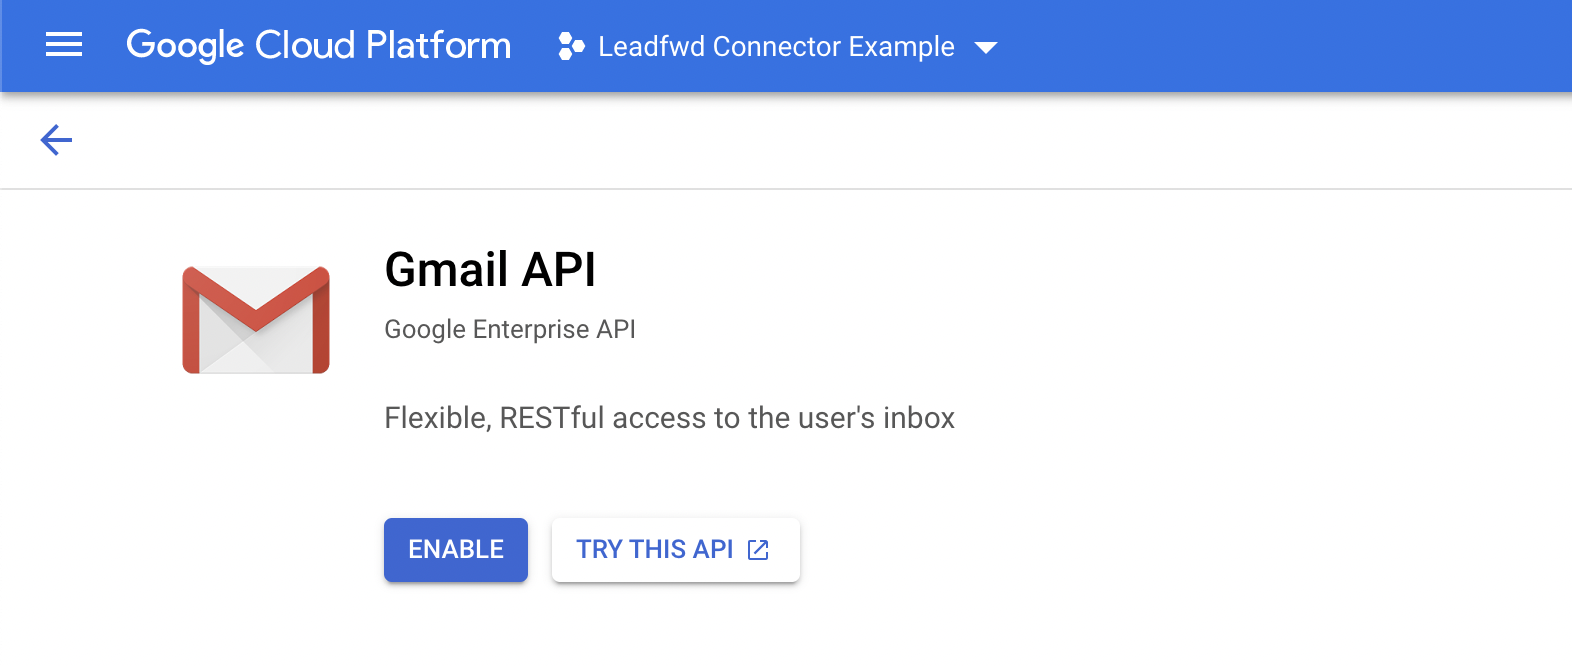
Enable Gmail API
Once your Project is named and created, navigate to (https://console.cloud.google.com/apis/library/gmail.googleapis.com) and click 'Enable' for the Gmail API.
Your Project (i.e. Leadfwd Connector Example) should be selected in the top menu next to Google Cloud Platform.
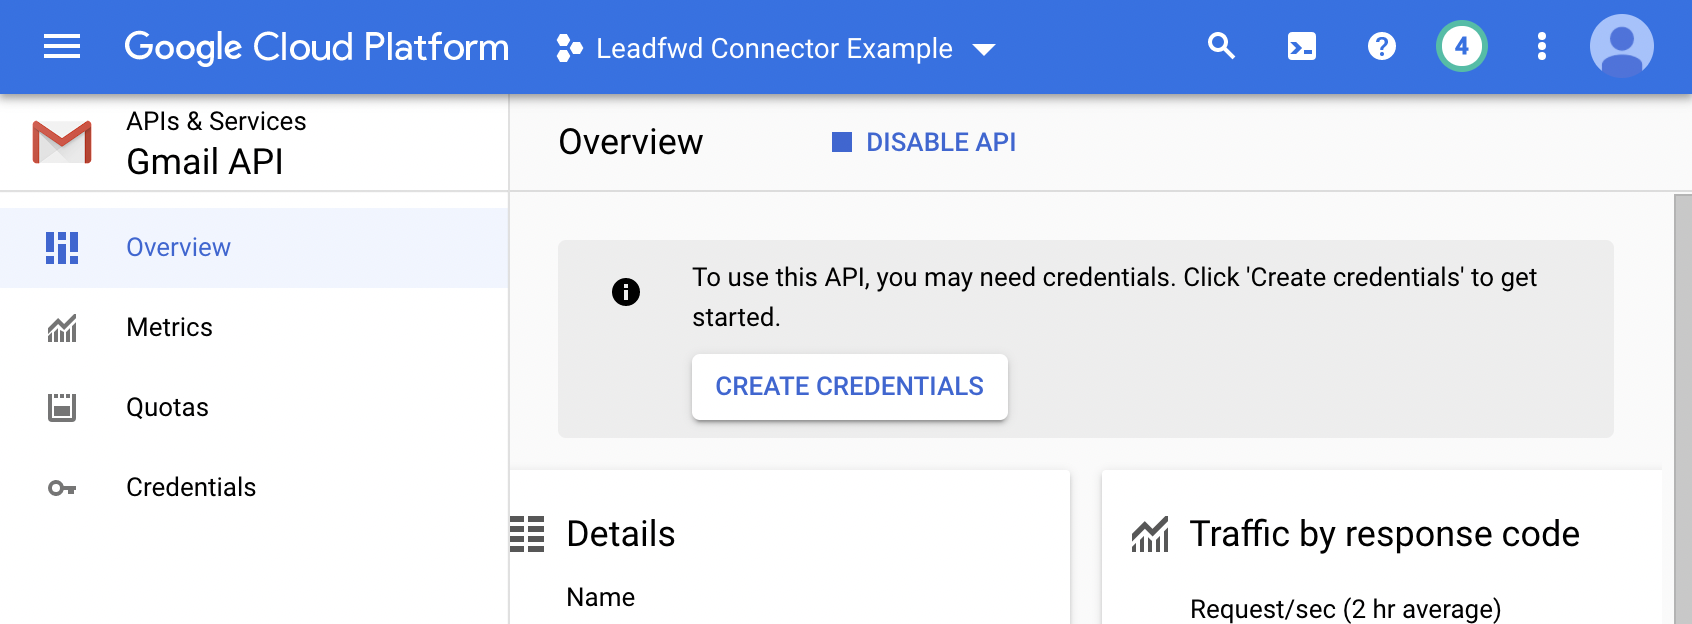
Create Credentials
Once the Gmail API is enabled, then continue to this link (https://console.cloud.google.com/apis/credentials/wizard) to set up credentials for the API or click the button from the Gmail API panel 'Create Credentials'
Credentials
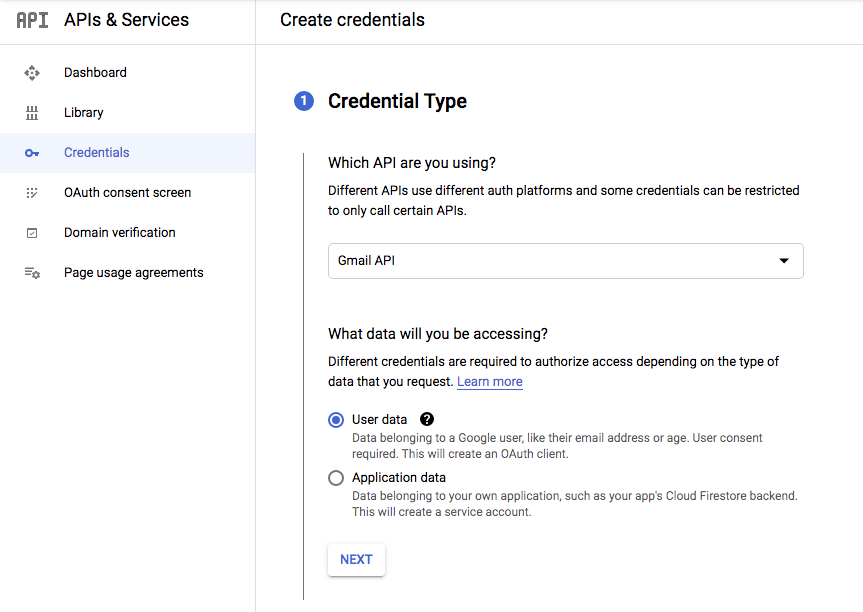
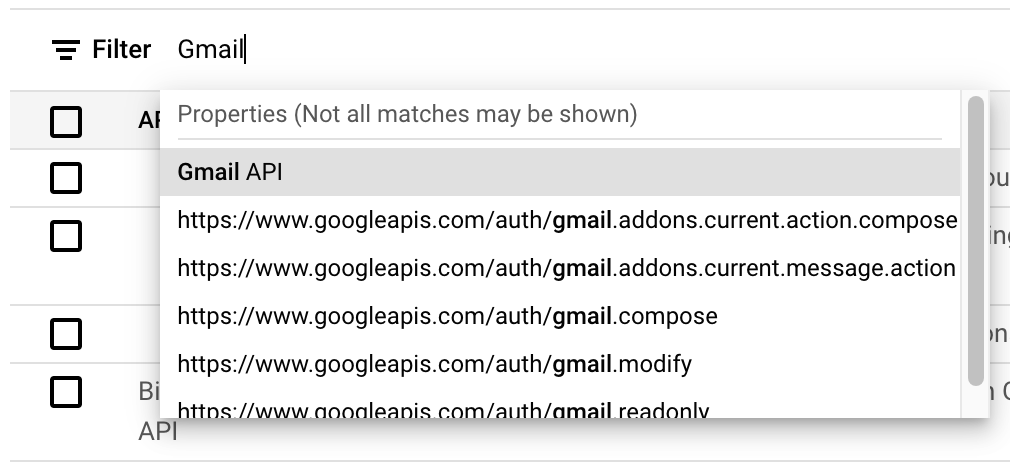
Which API are you using?
Start typing 'Gmail' to select Gmail API in the drop menu or scroll through the options to find it.
What data will you be accessing?
Select: User data
Click Next...
Set up Oauth Consent Screen
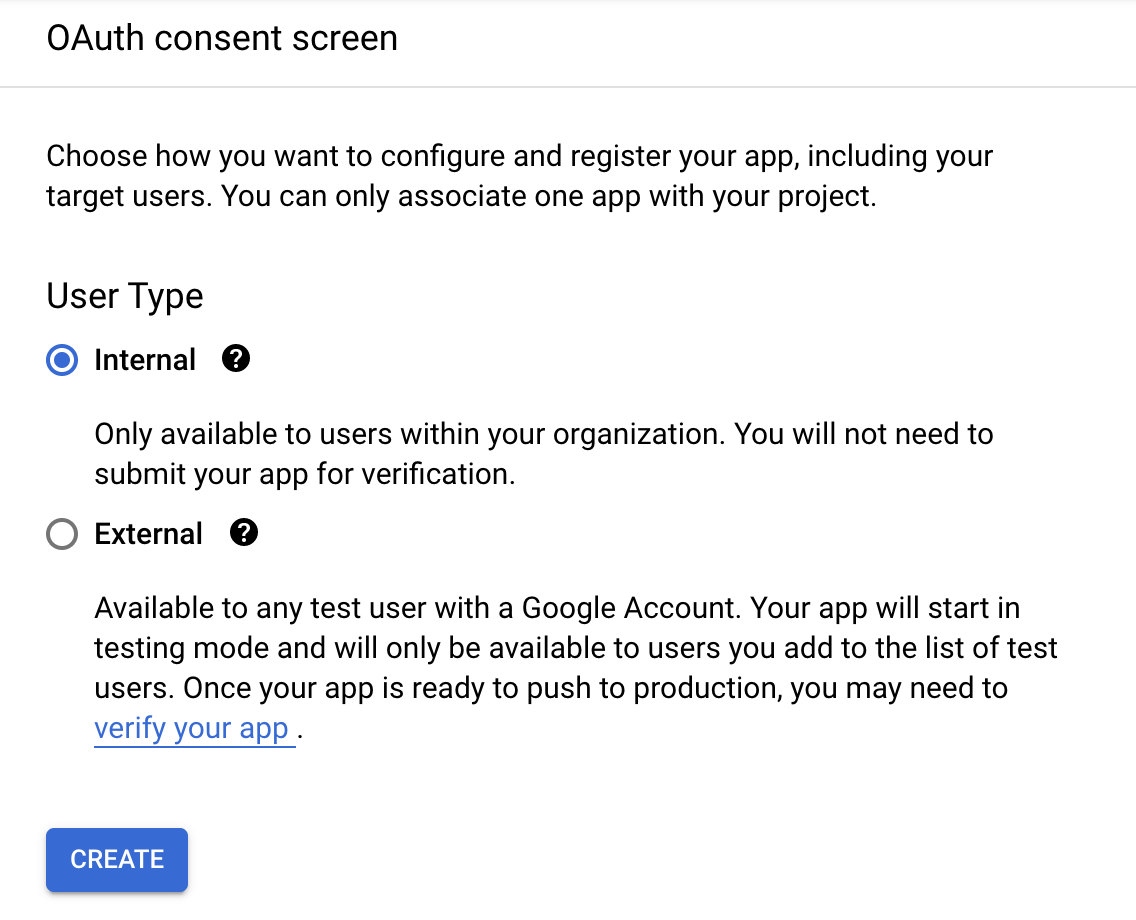
Select 'Internal' for the user type and click 'Create'
In order to connect mailboxes, each Gmail user will be required to grant consent to the application.
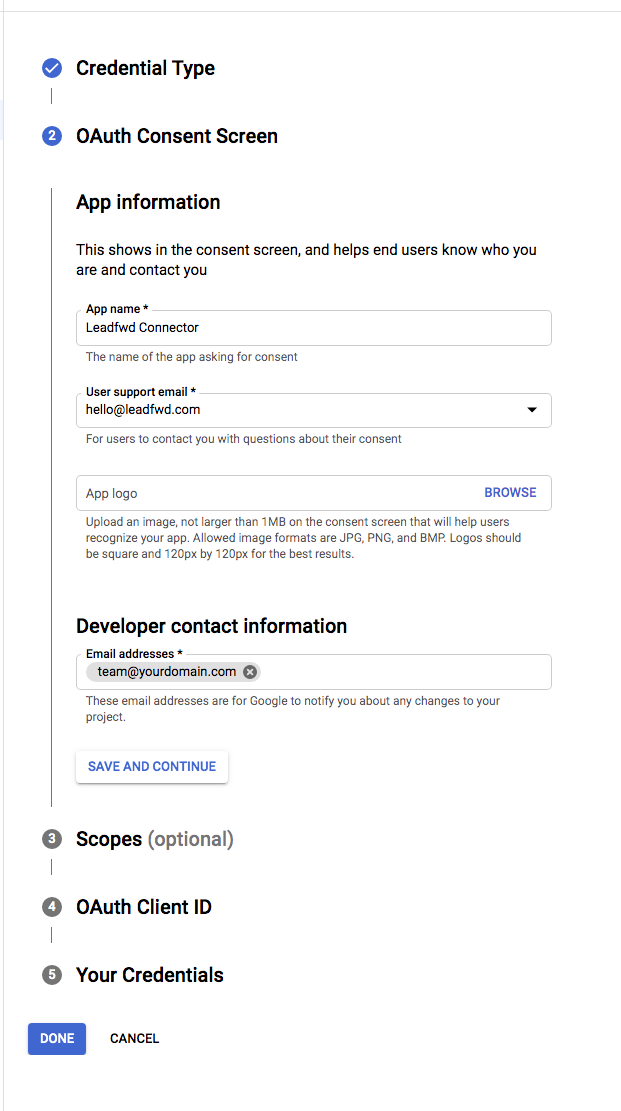
App Name
You can choose any name for the application. We recommend 'Leadfwd Connector' so that your team will recognize the usage and purpose of the authorization.
User support email
You will choose from a list of existing mailboxes and groups associated with your domain. We typically recommend using the email address of whomever is creating this application project for your team.
Developer contact information
We recommend you use the same email address as the 'User support email' selection, so your team can receive communication on any changes to the project.
Authorized domains
Based on the application domain that your Leadfwd account is deployed on, you'll need to enter it here. It will either be in25app.com, securenetgate9.com or inboxgateway.com. If your account is deployed from mx8.inboxgateway.com or mx9.inboxgateway.com, you'll simply use inboxgateway.com for this input only.
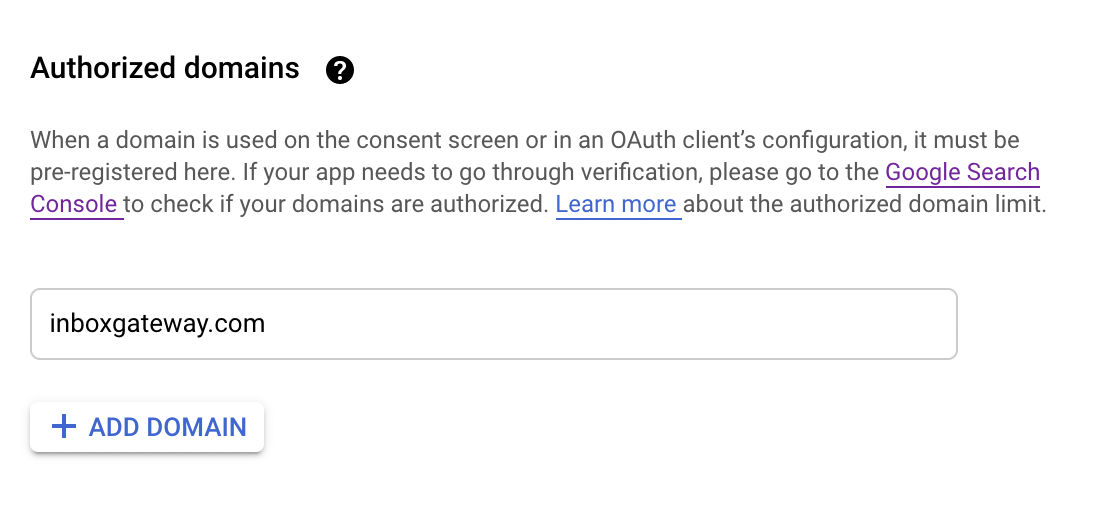
Click Save and Continue...
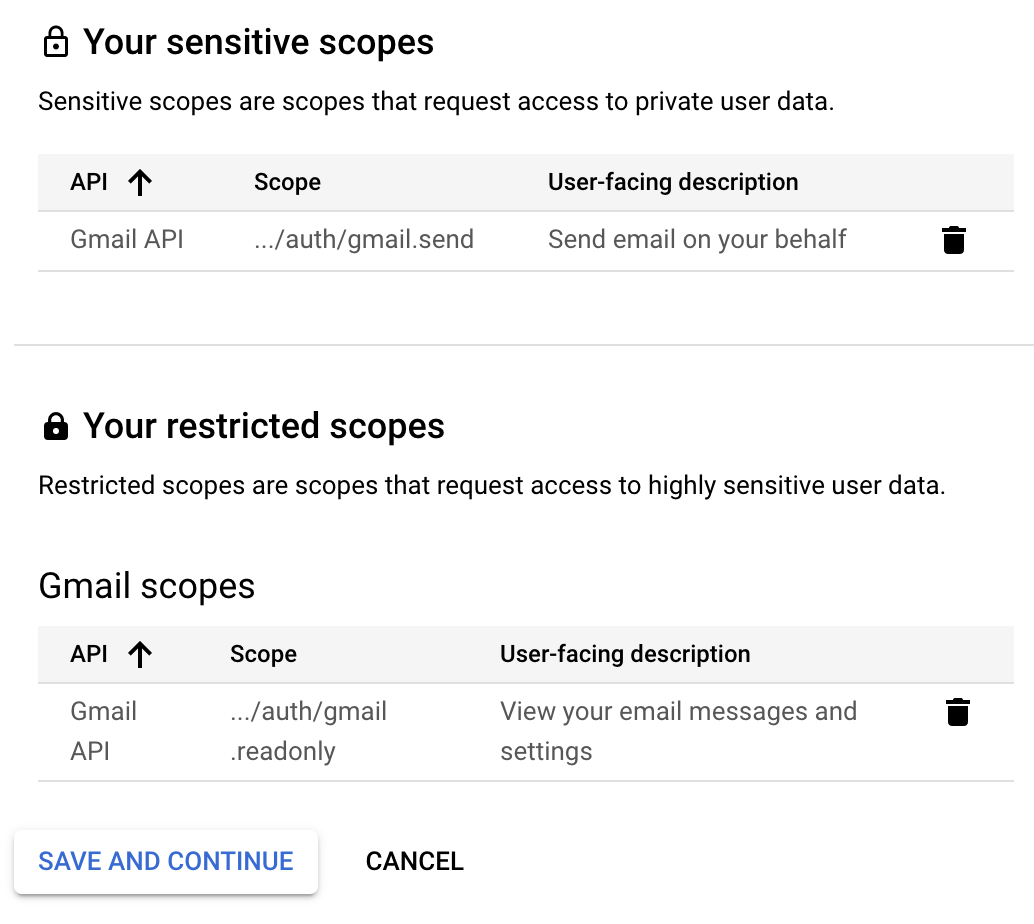
Permissions / Scopes
Scopes determine the type of permission the connector will have to your Gmail instance. Leadfwd only requires read-only access to mailboxes (to find replies to Sequences) and access to send emails using a mailbox with Sequences.
From the list of available scopes, select gmail.readonly and gmail.send:


Then, click Update...
Oauth Client ID
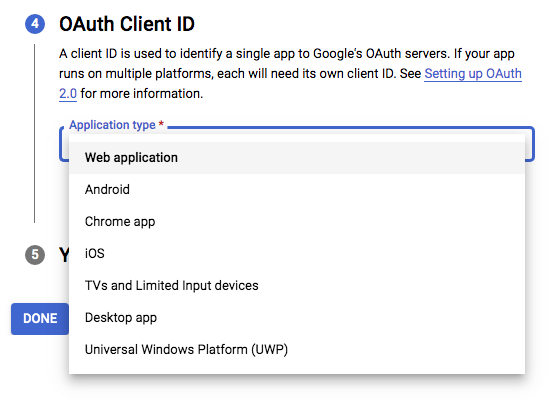
Now that the Oauth Consent Screen is set up, you can proceed to set up credentials for the connector. To do that navigate to the Credentials panel and from that view click on Create Credentials / Oauth Client ID at the top of the panel.
Application type
Select Web application
Name
Enter Leadfwd Connector or any name that is easily identifiable for your team in the future.
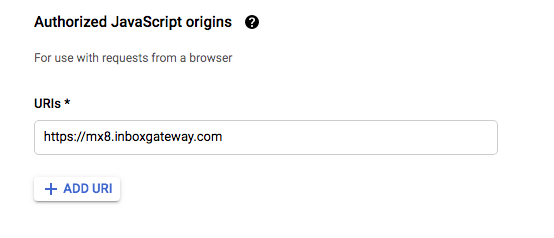
Authorized Javascript origins
This is the domain that your Leadfwd account is deployed from. When you login to your account you will see one of the following domains: in25app.com, securenetgate9.com, mx8.inboxgateway.com, mx9.inboxgateway.com.
Unlike Authorized domains for Oauth, you'll use the full domain (mx8.inboxgateway.com and mx9.inboxgateway.com) instead of just inboxgateway.com, if your account is deployed from either of those domains.
Enter that URL in the field provided.
Authorized redirect URI
You can find your Authorized URI paths in the Mailbox Connector > Connect New Mailbox > Select Gmail API
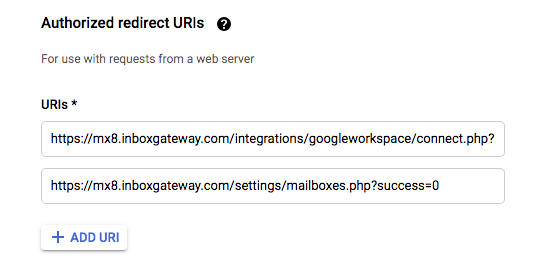
Click Create...
Copy/Paste Credentials
Now that your Connector is created, you'll receive a confirmation message with a Client ID. This is the unique identifier for your Oauth connector. Click Done...
You will be immediately redirected to the Oauth 2.0 Client IDs Manager. Click to 'Edit' your new Oauth client.
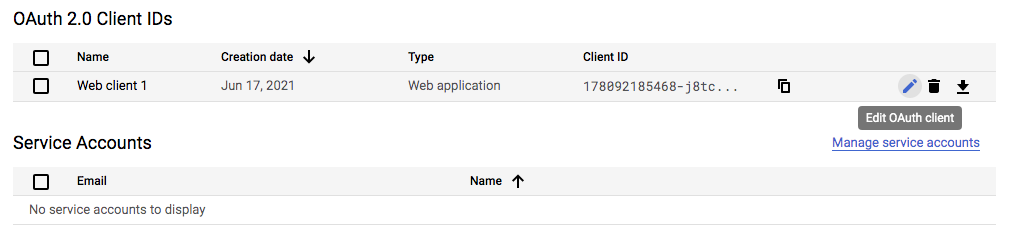
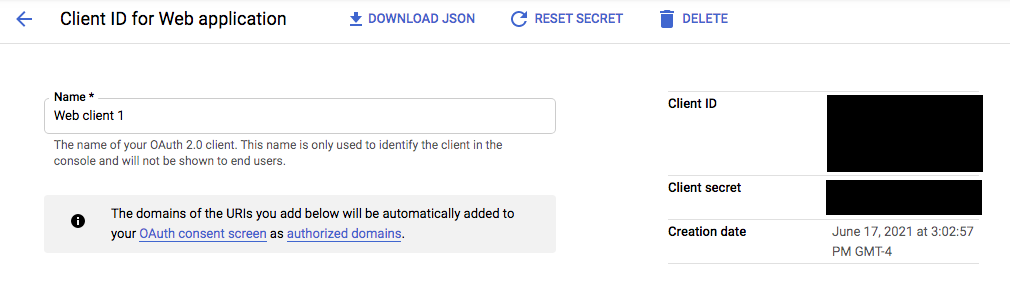
Save the Client ID and Client Secret
Available in the Mailbox Connector Settings View for 'Create New Oauth Domain' with two field inputs: Client ID and Client Secret (see below):
Comments
0 comments
Please sign in to leave a comment.